United Kingdom

hoover h wash 300 manual

Hoover H-Wash 300 Manual: A Comprehensive Guide

Welcome! This guide provides detailed instructions for the Hoover H-Wash 300 series, including models H3DS596TAMCE/1-S and H3WS610TAMCGE-80, offering a user-friendly experience.

The Hoover H-Wash 300 series represents a significant advancement in home laundry technology, designed to deliver exceptional cleaning performance with user convenience at its core. This series, encompassing models like the H3DS596TAMCE/1-S and H3WS610TAMCGE-80, caters to modern households seeking efficiency and reliability.

Available manuals, currently in English, detail a comprehensive range of features and functionalities. User feedback indicates high satisfaction, with the H3DS596TAMCE/1-S receiving an average rating of 8.5 from 11 users, and the H3WS610TAMCGE-80 achieving a remarkable 9.2 from a single reviewer. These washing machines are readily accessible through retailers like Argos, offering a blend of capacity (8kg) and spin speed (1400rpm) in a sleek white finish. This manual will guide you through maximizing your appliance’s potential.

Model Variations: H3DS596TAMCE/1-S & H3WS610TAMCGE-80

The H-Wash 300 series features distinct models tailored to diverse laundry needs. The H3DS596TAMCE/1-S, a popular choice, boasts a 36-page English manual rated 8.5/10 by users, emphasizing its ease of use and comprehensive features. Conversely, the H3WS610TAMCGE-80, documented in a 32-page manual, currently holds a perfect 9.2/10 rating from its single reviewer, suggesting exceptional performance and user satisfaction.

Both models are readily available, including through Argos (product code 856/7693 for an 8kg, 1400rpm white variant). While sharing the core H-Wash 300 technology, subtle differences may exist in specific cycle options or energy efficiency. Consulting the dedicated manual for your specific model is crucial for optimal operation and understanding its unique capabilities.

Getting Started

Begin your laundry experience by carefully installing the H-Wash 300 and familiarizing yourself with its control panel for efficient operation and optimal results.

Initial Setup and Installation

Unpacking and Positioning: Carefully unpack your Hoover H-Wash 300, removing all transportation bolts – crucially important – to prevent damage during operation. Position the washing machine on a firm, level surface, ensuring adequate space around it for ventilation and access.

Water Connection: Connect the water inlet hoses to the hot and cold water taps, verifying a secure fit to avoid leaks. The machine accepts standard water pressures; ensure your plumbing meets these requirements.

Drainage: Attach the drain hose securely to a suitable standpipe or sink drain, ensuring it’s positioned correctly to prevent backflow. Proper drainage is vital for efficient washing.

Electrical Connection: Plug the power cord into a grounded electrical outlet, confirming the voltage matches the machine’s specifications. Always prioritize electrical safety during installation.

Understanding the Control Panel

Program Selector Dial: The central dial allows you to choose from a variety of wash cycles, including Cotton, Synthetics, Delicates, and Quick Wash. Each cycle is optimized for specific fabric types and soil levels.

Temperature Buttons: Adjust the wash temperature using the dedicated buttons, ranging from cold wash to high-temperature sanitization. Select the appropriate temperature based on the garment care label.

Spin Speed Buttons: Control the spin speed to minimize wrinkles or maximize water extraction. Lower speeds are ideal for delicate fabrics, while higher speeds are suitable for robust items.

Start/Pause Button: Initiates or interrupts the wash cycle. The display will show the remaining time. Additional buttons control functions like Delay Start and Child Lock.

Wash Cycles Explained

Explore diverse options! The H-Wash 300 offers cycles for Cotton, Synthetics, Delicates/Wool, and a Quick Wash, catering to varied laundry needs effectively.

Cotton Cycle Settings

Optimizing for Cotton Fabrics: The Hoover H-Wash 300’s Cotton cycle is designed for durable, everyday cotton items like t-shirts, bed linen, and towels. Users can customize this cycle with several settings to achieve optimal cleaning results. Temperature adjustments are crucial; options typically range from cold wash to 90°C, allowing you to select the appropriate heat level based on the cotton’s color and soil level.

Spin Speed Control: Adjusting the spin speed impacts moisture retention. Higher speeds (up to 1400 RPM, depending on the model) extract more water, reducing drying time, but can cause more wrinkles. Lower speeds are gentler on fabrics. Pre-wash options are available for heavily soiled items, providing an initial wash before the main cycle.

Stain Removal: Some models may include specific stain removal programs within the Cotton cycle, targeting common stains like food or grass. Always consult the garment’s care label before selecting a cycle and temperature.

Synthetic Cycle Options

Caring for Synthetics: The Hoover H-Wash 300 offers dedicated Synthetic cycles for fabrics like polyester, nylon, and acrylics. These cycles utilize lower temperatures and gentler agitation compared to the Cotton cycle, preventing damage and maintaining fabric integrity. Temperature settings generally range from cold to 40°C, suitable for most synthetic garments.

Cycle Variations: Several variations within the Synthetic cycle cater to different needs. A ‘Delicate Synthetics’ option provides even gentler treatment for sensitive items. Spin speed control is vital; lower speeds minimize wrinkling and stretching. Some models feature a ‘Shirts’ program optimized for easy-ironing results.

Optimizing Wash Performance: Always check garment care labels before selecting a Synthetic cycle. Using the correct detergent formulated for synthetic fabrics enhances cleaning performance and protects colors.


Delicate/Wool Cycle Guide

Gentle Fabric Care: The Hoover H-Wash 300 features specialized Delicate and Wool cycles designed to protect fragile fabrics. These cycles employ extremely gentle agitation and low temperatures – typically cold or a maximum of 30°C – to prevent shrinking, stretching, or damage. Utilizing a dedicated wool detergent is crucial for optimal results and fiber preservation.

Cycle Specifics: The Wool cycle often includes a slower spin speed to minimize stress on the fibers. The Delicate cycle is suitable for silk, lace, and other sensitive materials. Always place delicate items in a mesh laundry bag for added protection during the wash cycle.

Important Considerations: Always check garment care labels before using these cycles. Avoid overloading the machine, as this can reduce cleaning effectiveness and increase the risk of damage.

Quick Wash Program Details

Speed and Efficiency: The Hoover H-Wash 300’s Quick Wash program is ideal for lightly soiled garments requiring a fast refresh. Typically completing a cycle in under 30 minutes, it’s perfect for busy lifestyles. This program utilizes a higher water flow rate and optimized drum movements to deliver a satisfactory clean in a shorter timeframe.

Load Capacity: While convenient, the Quick Wash cycle is best suited for smaller loads – approximately half the machine’s maximum capacity – to ensure effective cleaning. Overloading can compromise the wash quality.

Temperature & Spin: The Quick Wash generally operates at a moderate temperature, around 40°C, and a reduced spin speed. It’s not recommended for heavily soiled items or fabrics requiring specific temperature settings.

Advanced Features

Enhanced Control: Explore features like Delay Start, precise Temperature Adjustment, and customizable Spin Speed Control for a tailored washing experience with your H-Wash 300.

Delay Start Functionality

Convenient Scheduling: The Hoover H-Wash 300’s Delay Start function allows you to conveniently schedule wash cycles to coincide with off-peak energy hours or to have laundry finished when you are ready. This feature provides flexibility and optimizes your laundry routine.

How to Use: To activate Delay Start, simply press the dedicated button on the control panel. Each press typically increases the delay time in increments – often ranging from 1 to 24 hours. The display will clearly indicate the remaining delay time before the cycle begins.

Benefits: Utilizing Delay Start not only saves energy but also allows for quieter operation during nighttime hours. It’s perfect for those with busy schedules or who prefer a more automated laundry process. Ensure the water supply and detergent are prepared before setting the delay.

Temperature Adjustment Options

Precise Control: The Hoover H-Wash 300 offers a range of temperature settings, allowing you to tailor each wash cycle to the specific fabric type and soil level. This ensures optimal cleaning performance while protecting your garments from damage.

Available Settings: Typically, you can select temperatures ranging from cold wash (often around 15°C/59°F) up to 90°C/194°F for heavily soiled items. Intermediate options like 30°C, 40°C, and 60°C are also readily available. The control panel displays the selected temperature clearly.

Fabric Care: Lower temperatures are ideal for delicate fabrics and colors, preventing fading and shrinkage. Higher temperatures are best for whites and heavily soiled items, effectively eliminating bacteria and stains. Always consult the garment care label before selecting a temperature.

Spin Speed Control

Optimizing Moisture Levels: The Hoover H-Wash 300 empowers users with adjustable spin speeds, crucial for balancing drying time and fabric care. Higher spin speeds extract more water, reducing drying time, but can cause increased wrinkling. Lower speeds are gentler on delicate items.

Speed Ranges: Spin speeds are generally measured in revolutions per minute (RPM). Common options include settings from 400 RPM to 1400 RPM, or even higher on some models. A ‘No Spin’ option is also available for extremely delicate fabrics.

Fabric Considerations: Delicate fabrics like silk and wool benefit from lower spin speeds to prevent damage. Sturdier items like towels and jeans can withstand higher speeds for efficient water extraction. Always check garment care labels for recommended spin speed guidelines.

Maintenance and Troubleshooting

Essential Care: Regularly cleaning the detergent drawer and filter ensures optimal performance, while understanding common error codes helps resolve issues quickly and efficiently.

Cleaning the Detergent Drawer

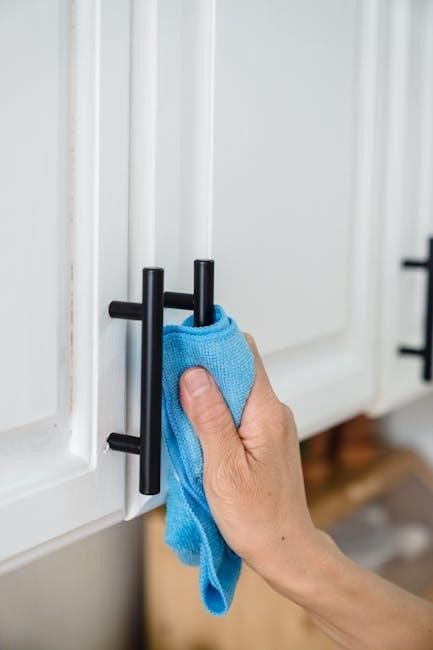
Maintaining a Fresh Wash: The detergent drawer requires periodic cleaning to prevent residue buildup, ensuring optimal detergent dispensing and preventing unpleasant odors. To remove the drawer, typically you’ll find a release button or lever – consult your specific model’s manual for precise location.

Once removed, thoroughly rinse the drawer compartments under warm running water, using a soft brush to dislodge any solidified detergent or fabric softener. Pay close attention to the pre-wash, main wash, and softener compartments. Stubborn residue can be tackled with a solution of warm water and a mild detergent.

After cleaning, ensure the drawer is completely dry before reinserting it into the washing machine. A damp drawer can contribute to mold growth. Regular cleaning, ideally every month or more frequently with heavy use, will keep your H-Wash 300 functioning at its best and your laundry smelling fresh.

Filter Cleaning Procedures

Protecting Your Machine: Regularly cleaning the filter is crucial for maintaining the performance of your Hoover H-Wash 300 and preventing drainage issues. The filter’s location varies by model, but it’s generally found behind a small access panel at the front, lower part of the machine.

Before opening the panel, prepare for potential water spillage by placing a shallow container and towels nearby. Carefully unscrew and remove the filter – it may contain debris like lint, coins, or small objects. Rinse the filter thoroughly under running water, removing all accumulated debris.

Inspect the filter housing for any obstructions and clean it as needed. Once clean, securely reinsert the filter and close the access panel. Consult your user manual for specific filter access instructions and recommended cleaning frequency, typically every few months.

Common Error Codes and Solutions

Decoding Appliance Signals: Your Hoover H-Wash 300 utilizes error codes to communicate potential issues. A frequently encountered code is ‘F01’, indicating a water supply problem – check the tap and inlet hose for kinks or obstructions. ‘F02’ signals a drainage issue; verify the drain hose isn’t blocked and the filter is clean.

If you see ‘F03’, it suggests an imbalance during the spin cycle; redistribute the laundry evenly within the drum. ‘F04’ often points to excessive foam, requiring a reduction in detergent usage. For codes like ‘F11’ or ‘F12’, relating to heating elements, professional assistance is recommended.

Always consult the full error code list in your user manual for precise definitions and troubleshooting steps. Resetting the machine by unplugging it for a few minutes can sometimes resolve minor errors.

Safety Information

Prioritize safety! Always follow precautions, utilize the child lock feature, and ensure proper installation to prevent hazards while operating your H-Wash 300.

Important Safety Precautions

Read carefully before use! To ensure safe operation of your Hoover H-Wash 300, always disconnect the appliance from the power supply during installation, maintenance, and cleaning procedures. Never attempt to repair the washing machine yourself; contact qualified service personnel for assistance.

Do not allow children to play with or operate the appliance unsupervised. Keep pets away from the washing machine during operation. Ensure the appliance is properly grounded to prevent electric shock. Avoid overloading the drum, as this can damage the machine and affect performance.

Inspect the power cord regularly for damage and replace it if necessary. Do not use extension cords or adapters. Only use detergents specifically designed for washing machines, following the manufacturer’s instructions. Keep flammable materials away from the appliance. Always close the door during operation to prevent accidents.

Child Lock Feature

Protecting little ones! The Hoover H-Wash 300 incorporates a Child Lock feature designed to prevent accidental operation by children. This safety mechanism disables the control panel buttons, rendering the machine inoperable without deactivation. To activate, typically a combination of buttons – often ‘Spin Speed’ and ‘Delay Start’ – must be pressed simultaneously for a few seconds.

A visual indicator, such as a padlock symbol illuminating on the display panel, confirms activation. To deactivate the Child Lock, repeat the button combination. This prevents unintended program changes or starts, ensuring safety within the household.

Consult your specific model’s manual (H3DS596TAMCE/1-S or H3WS610TAMCGE-80) for precise instructions, as the activation/deactivation process may vary slightly. Regularly check if the feature is engaged, especially in homes with young children.

Guide

avaya 9611g quick user guide

Avaya 9611G Quick User Guide ⎻ Overview

The Avaya 9611G is an 8-line IP deskphone, perfect for everyday users needing reliable communication tools like speed dial and directory access.

What is the Avaya 9611G?

The Avaya 9611G is a versatile and user-friendly IP deskphone designed to enhance everyday communication. It’s an 8-line model, making it ideally suited for users who rely on core telephony functions to boost productivity. This phone isn’t geared towards advanced users, but rather those who appreciate simplicity and reliability.

Supporting both Session Initiation Protocol (SIP) and Digital Enhanced Cordless Telecommunications (DECT), the 9611G seamlessly integrates with various communication systems. This allows for flexible call handling across different platforms. Avaya emphasizes that users should adhere to the instruction manual for proper equipment operation, and disclaims responsibility for unauthorized modifications. It provides a solid foundation for essential office communication needs.


Target User Profile

The Avaya 9611G is primarily designed for the everyday user – individuals who view their phone as a crucial, yet straightforward, communication tool. This profile encompasses those who regularly utilize common features like speed dial and the directory to streamline their calls and enhance overall productivity.

It’s not intended for power users requiring complex functionalities. Instead, it caters to those who appreciate a reliable and easy-to-operate device. The 9611G suits employees who need consistent call quality and basic features without the need for extensive configuration or advanced technical knowledge. Essentially, it’s for users who want a phone that simply works efficiently.

Phone Layout & Key Functions

The Avaya 9611G features a standard layout with a keypad, display screen, and function keys for navigating calls and accessing essential features easily.

Physical Components of the 9611G

The Avaya 9611G boasts a user-friendly design, incorporating several key physical components. A prominent display screen provides call information and menu navigation. Below the screen resides a standard numeric keypad for dialing and accessing features. Dedicated function keys offer one-touch access to commonly used options like hold, transfer, and conference calling.

Additionally, the phone includes volume control buttons for adjusting audio levels. A navigation cluster allows for intuitive menu scrolling and selection. A headset jack enables hands-free communication, while Ethernet ports facilitate network connectivity. The base provides stable placement, and the handset offers a comfortable grip during calls. These components work together to deliver a streamlined and efficient communication experience.

Keypad Functions & Navigation

The Avaya 9611G keypad facilitates dialing and feature access. Numeric keys input phone numbers, while the ‘*’ and ‘#’ keys often trigger special functions or menu options. The navigation cluster, typically located below the keypad, enables menu scrolling and selection.

Users can utilize the directional keys (up, down, left, right) to navigate through on-screen menus and lists. A central ‘OK’ or ‘Select’ button confirms selections. The ‘Cancel’ or ‘Exit’ key returns to the previous menu. Softkeys, dynamically labeled on the display, provide context-sensitive actions. Mastering this navigation system allows efficient access to the phone’s diverse features and settings, enhancing overall usability.

Display Screen Information

The Avaya 9611G’s display screen provides crucial call and phone status information. It typically shows the current time, date, and line appearances, indicating active or inactive lines. Incoming caller ID information, including name and number, is prominently displayed during an incoming call.

Softkeys located beneath the screen dynamically change to reflect the current context, offering quick access to frequently used functions like hold, transfer, and conference. The screen also presents menu options and settings, guiding users through phone configuration. Visual cues, such as icons, indicate message waiting or other important notifications, ensuring users stay informed.

Making and Receiving Calls

The Avaya 9611G facilitates seamless communication, allowing users to easily make and answer calls, utilizing features like hold and transfer efficiently.

Making an Outgoing Call

To initiate an outgoing call on your Avaya 9611G, simply lift the handset or press the speakerphone button. Then, dial the desired phone number using the keypad. The phone supports various dialing methods, including direct dialing of internal and external numbers.

Before dialing, ensure you have the correct area code if calling a long-distance number. The display screen will show the dialed number as you enter it. Once the number is complete, the call will automatically connect.

You can also utilize the directory or speed dial features for quicker access to frequently called numbers, streamlining your calling process and boosting productivity. Remember to verify the connection before proceeding with your conversation.

Answering an Incoming Call

When receiving a call on your Avaya 9611G, the phone will ring, and the display screen will illuminate with caller ID information, if available. To answer the call, simply lift the handset from the cradle or press the speakerphone button. The call will immediately connect, allowing you to begin your conversation.

The display screen will show the call duration once the connection is established. You can easily switch between handset and speakerphone during the call as needed. Ensure a clear audio connection for optimal communication.

If you wish to ignore the incoming call, simply allow it to ring until it stops, or press the ‘Reject’ button if available on your system configuration.

Putting a Call on Hold

To place an active call on hold using your Avaya 9611G, press the ‘Hold’ button located on the phone’s keypad. The display screen will indicate that the call is now on hold, typically with a visual indicator like a flashing light or a specific on-screen message. The other party will usually hear hold music or a silence, depending on the system configuration.

To retrieve a call from hold, simply press the ‘Hold’ button again. This will resume the conversation with the original caller. Be mindful of extended hold times, as callers may become disconnected.

Some systems allow for warm transfers from hold, connecting the caller to another extension.

Transferring a Call

Transferring a call on the Avaya 9611G allows you to connect a caller to another extension. First, place the current call on hold by pressing the ‘Hold’ button. Then, dial the extension number of the person you wish to transfer the call to. Once you hear ringing or receive an answer, press the ‘Transfer’ button to complete the transfer.

For a warm transfer, speak to the recipient before connecting the caller, ensuring they are available. Some systems may require a different transfer key or sequence. Always confirm the transfer is successful before disconnecting.

Incorrect transfers can disconnect callers, so double-check the extension number.

Call Features

The Avaya 9611G offers useful features, including a directory for contacts, speed dial for quick access, call forwarding, and convenient conference calling options.

Using the Directory

The Avaya 9611G directory feature allows you to store and quickly access frequently called numbers and contact information. To access the directory, press the “Directory” softkey on the phone’s display screen. You can then search for contacts by name or number using the keypad.

Adding new contacts is typically done through the phone’s system administrator or a web-based interface, depending on your organization’s setup. Once a contact is found, you can initiate a call by pressing the “Call” softkey. The directory is a valuable tool for enhancing productivity and streamlining your communication process, eliminating the need to manually dial numbers repeatedly. Regularly updated directories ensure accurate and efficient contact management.

Speed Dial Configuration & Usage

Speed dial on the Avaya 9611G significantly reduces call connection time for frequently contacted individuals. Configuration is usually managed by the system administrator, assigning numbers to specific speed dial codes. To use speed dial, press the “Speed Dial” softkey, followed by the assigned two-digit code for the desired contact.

The phone will then automatically dial the associated number. Speed dial is a powerful productivity tool, especially for internal extensions or important external contacts. Your organization may offer a list of pre-configured speed dial numbers. Contact your IT department for assistance with adding or modifying speed dial entries if needed, ensuring efficient communication.

Call Forwarding Options

The Avaya 9611G offers versatile call forwarding, ensuring you never miss important calls. You can forward calls to another extension, an external phone number, or even a voicemail box. Access call forwarding settings through the phone’s menu, typically under “Settings” or “Call Forwarding.” Options usually include “Always Forward,” “Busy Forward,” and “No Answer Forward.”

“Always Forward” directs all calls, while “Busy Forward” activates when you’re already on a call. “No Answer Forward” forwards calls if unanswered after a set number of rings. Remember to deactivate forwarding when no longer needed to avoid misdirected calls. Consult your system administrator for specific instructions and available options within your organization’s configuration.

Conference Calling

The Avaya 9611G facilitates efficient conference calls, allowing multiple participants to connect simultaneously. To initiate a conference, first establish a call with the initial participant. Then, place that call on hold and dial the next participant. Once connected, you can typically merge the calls into a conference using a dedicated “Conf” or “Merge” softkey on the phone’s display.

You can add further participants by repeating the hold-and-dial process. Manage the conference by muting individual participants or adjusting speaker volume. Remember to check your system’s limitations regarding the maximum number of participants allowed per conference call. Consult your system administrator for specific procedures and available features.

Advanced Features

The Avaya 9611G supports SIP and DECT protocols, offering Message Waiting Indicator (MWI), adjustable volume, headset compatibility, and integration with various systems.

Using Message Waiting Indicator (MWI)

The Message Waiting Indicator (MWI) on the Avaya 9611G alerts you to new voice messages. When a new message arrives, the MWI icon – typically a red light or a specific symbol on the display screen – illuminates or flashes. This visual cue ensures you don’t miss important communications.

To access your voicemail and retrieve these messages, you’ll generally need to press a dedicated voicemail key on the phone. The specific key may vary depending on your system configuration, but it’s often labeled “Messages” or a similar designation. Following the prompts will guide you through listening to and managing your voicemail.

Clearing the MWI typically happens automatically after you’ve listened to all new messages. However, some systems may require a specific action to manually clear the indicator. Consult your system administrator for details if the MWI remains active after checking your voicemail.

Adjusting Volume Settings

The Avaya 9611G allows you to customize audio levels for both the ringer and the handset/headset volume. Dedicated volume control keys, usually located on the front or side of the phone, enable quick adjustments. Pressing the “Volume Up” key increases the loudness, while “Volume Down” decreases it.

These adjustments affect the audio during active calls, as well as the ringer volume for incoming calls. Some systems may also offer separate settings for handset and headset volumes, providing greater control over your listening experience.

Experiment with different volume levels to find what’s most comfortable for your environment and personal preference. Be mindful of maintaining a safe listening volume to protect your hearing.

Headset Compatibility & Setup

The Avaya 9611G supports a wide range of headsets, enhancing privacy and comfort during calls. Typically, headsets connect via a standard RJ-11 port located on the side or back of the phone. Ensure your headset is compatible with Avaya systems for optimal performance.

For initial setup, simply plug the headset cable into the designated port. The phone should automatically detect the headset. If not, you may need to adjust audio settings within the phone’s menu. Some headsets require a separate amplifier, particularly for older models or longer cable lengths.

Verify proper functionality by making a test call and confirming clear audio transmission and reception.

SIP Protocol Support

The Avaya 9611G boasts robust support for the Session Initiation Protocol (SIP), a widely adopted standard for voice and video communication. This compatibility allows seamless integration with various IP-based phone systems and Unified Communications platforms. Utilizing SIP enables features like call routing, registration, and advanced call handling capabilities;

Configuration typically involves entering SIP server details – including address, port, and authentication credentials – within the phone’s settings menu. Proper SIP configuration is crucial for successful call establishment and feature functionality.

The 9611G’s SIP support ensures flexibility and interoperability within modern communication infrastructures.

Navigation & System Settings

Access the settings menu on the Avaya 9611G to customize features like date, time, and language preferences for a personalized user experience.

Accessing the Settings Menu

To access the settings menu on your Avaya 9611G, begin by ensuring the phone is in an idle state – not currently engaged in a call. Press the ‘Menu’ or ‘Options’ softkey, typically located directly below the display screen. This action will bring up the main settings menu on the phone’s display.

Utilize the navigation keys – the directional arrows – to scroll through the available options. These options generally include settings for date and time, language preferences, volume control, and network configurations. Select the desired setting by pressing the ‘Select’ or ‘OK’ softkey.

Within each setting, you can further adjust parameters using the same navigation and selection process. Remember to save any changes made before exiting the settings menu to ensure they are applied.

Date and Time Configuration

Configuring the date and time on your Avaya 9611G ensures accurate call logs and proper system synchronization. From the main settings menu, navigate to and select the ‘Date/Time’ option using the directional keys and ‘Select’ softkey. You’ll typically be presented with separate fields for date and time adjustment.

Use the numeric keypad to enter the correct date, following the format displayed on the screen (usually MM/DD/YYYY). Similarly, input the correct time, often in a 24-hour format (HH:MM:SS). After entering the desired values, select ‘Save’ or ‘Apply’ to confirm your changes.

Verify the updated date and time displayed on the phone’s screen to confirm successful configuration.

Language Settings

Personalizing your Avaya 9611G includes setting your preferred display language. Access the settings menu using the navigation keys and ‘Select’ softkey, then locate the ‘Language’ option. A list of available languages will appear on the screen; use the up and down directional keys to scroll through the options.

Highlight your desired language and press ‘Select’ to apply the change. The phone’s interface, including menus and prompts, will then be displayed in the newly selected language.

If you need to revert to the default language, simply repeat these steps and choose your original preference from the list. This feature enhances usability for a diverse user base.

Troubleshooting Common Issues

Common problems include no dial tone or poor audio; check connections and headset setup first; Display issues may require a phone reset.

No Dial Tone Troubleshooting

Experiencing no dial tone with your Avaya 9611G? Begin by verifying the physical connection of the phone to the network. Ensure the Ethernet cable is securely plugged into both the phone and the network jack. Confirm the cable isn’t damaged.

Next, check if the phone is properly registered with the Avaya system. A reboot of the phone can often resolve temporary registration issues. If the problem persists, verify that the network itself has connectivity.

Test with another device to rule out a broader network outage. Finally, consult your system administrator to confirm the phone’s configuration within the Avaya system is correct and hasn’t been inadvertently altered.

Poor Audio Quality Solutions

If you’re experiencing poor audio quality on your Avaya 9611G, several factors could be at play. First, check your headset connection if you’re using one; a loose or faulty headset can cause static or muffled sound. Ensure the volume level is appropriately adjusted on both the phone and your headset.

Next, investigate potential network issues. Packet loss or network congestion can significantly degrade audio quality. Try restarting your phone and, if possible, test the connection with another device.

Finally, confirm that the phone’s firmware is up-to-date, as updates often include audio optimization improvements. Contact your IT administrator if issues persist.

Display Issues & Fixes

Encountering display problems with your Avaya 9611G? A blank or flickering screen often indicates a power issue. Verify the power adapter is securely connected to both the phone and a working electrical outlet. Try a different outlet to rule out a power source problem.

If the screen is dim, adjust the backlight settings within the phone’s settings menu. For distorted images or unresponsive touchscreens, a simple phone restart can often resolve the issue.

Should problems persist, check for available firmware updates, as these frequently address display-related bugs. Contact your IT support for further assistance if needed.

Maintenance & Safety

Regularly clean the Avaya 9611G with a soft, dry cloth. Avoid liquids and harsh chemicals. Follow all standard safety precautions when using electrical equipment.

Cleaning the Phone

To ensure the longevity and optimal performance of your Avaya 9611G, regular cleaning is recommended. Always disconnect the power adapter before commencing any cleaning procedures. Use a soft, lint-free cloth, slightly dampened with water if necessary, to wipe down the exterior surfaces of the phone.

Avoid using abrasive cleaners, solvents, or harsh chemicals, as these can damage the plastic casing and potentially affect the functionality of the device. Pay particular attention to the keypad and display screen, gently removing any dust or fingerprints. For hard-to-reach areas, a can of compressed air can be used to dislodge debris.

Ensure the phone is completely dry before reconnecting the power adapter. Proper cleaning not only maintains a professional appearance but also helps prevent the buildup of germs and bacteria.

Important Safety Precautions

When using the Avaya 9611G IP Deskphone, adhere to these crucial safety guidelines. Avoid using the device during thunderstorms to prevent electrical shock. Do not expose the phone to extreme temperatures or humidity, as this can cause damage or malfunction.

Never attempt to disassemble or repair the phone yourself; contact qualified personnel for any maintenance needs. Ensure the power adapter is properly grounded and avoid overloading electrical outlets; Keep liquids away from the phone to prevent short circuits.

Always follow the manufacturer’s instructions outlined in the user manual. Proper usage and care will ensure a safe and reliable communication experience with your Avaya 9611G.

Australia

manual handling training aged care

Manual Handling Training in Aged Care: A Comprehensive Plan

Effective training is crucial for aged care staff, addressing musculoskeletal disorder risks and ensuring compliance with the Aged Care Act 1997 and WHS regulations.

Manual handling within aged care encompasses a wide range of tasks, frequently involving the movement and support of residents with varying levels of mobility; This includes assisting with transfers, lifting, repositioning, and aiding with toileting – all activities carrying inherent risks for both caregivers and those receiving care. The prevalence of musculoskeletal disorders (MSDs) among aged care workers is notably high, directly linked to these physically demanding duties.

Therefore, a robust understanding of safe manual handling principles is paramount. Effective training isn’t merely about technique; it’s about fostering a safety culture, recognizing hazards, and proactively mitigating risks within the care environment, ultimately optimizing resident mobility and well-being.

The Importance of Training

Comprehensive manual handling training is fundamentally important in aged care, directly impacting worker health, resident safety, and organizational compliance. It equips staff with the knowledge and skills to minimize the risk of musculoskeletal disorders (MSDs), a significant concern within the industry.

Proper training demonstrates adherence to the Work Health and Safety (WHS) Act and Aged Care Accreditation Standards, potentially assisting assessors in evaluating resident mobility optimization. Beyond legal requirements, it fosters a culture of care, promoting respectful and safe interactions, and enabling personalized assistance that enhances resident comfort and dignity.

Legal and Regulatory Framework

A robust legal and regulatory framework underpins manual handling training in aged care, primarily driven by the Work Health and Safety (WHS) Act. This legislation mandates employers to provide a safe working environment, including adequate training to minimize risks associated with handling residents.

Furthermore, the Aged Care Act 1997 and its associated Accreditation Standards emphasize the importance of optimizing resident mobility and safety. Compliance is demonstrated through documentation and assessment, where training records play a vital role. Employees also have legal obligations to report incidents and hazards, contributing to a proactive safety culture.

Aged Care Act 1997 & Accreditation Standards

The Aged Care Act 1997 significantly influences manual handling practices through its accreditation standards, specifically focusing on resident wellbeing and staff safety. Assessors evaluate facilities on their ability to optimize resident mobility, which is directly linked to effective manual handling techniques and appropriate environmental design.

A tool quantifying how well the environment supports individual resident needs regarding mobility would greatly assist assessors, overcoming limitations of documentation and site visit constraints. Demonstrating compliance requires robust training programs and documented evidence of staff competency in safe manual handling procedures, ultimately enhancing care quality.

Work Health and Safety (WHS) Act Responsibilities

The Work Health and Safety (WHS) Act places clear responsibilities on both employers and employees regarding manual handling in aged care settings. Employers must provide a safe working environment, including appropriate training, equipment, and risk assessments to minimize musculoskeletal disorder (MSD) risks.

Employees, conversely, are obligated to take reasonable care for their own health and safety, as well as that of their colleagues and residents. This includes actively participating in training, reporting incidents or hazards, and utilizing safe manual handling techniques. Adherence to the WHS Act is paramount for legal compliance and ethical care.

Understanding Musculoskeletal Disorders (MSDs)

Musculoskeletal Disorders (MSDs) are a significant concern within the aged care industry, frequently linked to the physically demanding nature of the work. These disorders affect muscles, nerves, tendons, ligaments, joints, cartilage, and spinal discs, causing pain, discomfort, and functional limitations.

The manual handling of people, a core task in aged care, is a known contributor to a high incidence of MSDs among staff. Understanding the causes, symptoms, and preventative measures for MSDs is crucial for protecting worker wellbeing and ensuring the delivery of quality care. Early recognition and intervention are key.

Common MSDs in Aged Care Workers

Aged care workers frequently experience a range of Musculoskeletal Disorders (MSDs) due to repetitive tasks and physically demanding resident care. Lower back pain is exceptionally prevalent, stemming from lifting, transferring, and repositioning residents. Shoulder disorders, including tendinitis and bursitis, are also common, often caused by reaching and assisting with mobility.

Furthermore, wrist and hand injuries, like carpal tunnel syndrome, can arise from repetitive movements. Neck pain and strains are also reported. Recognizing these common MSDs allows for targeted preventative strategies and early intervention, minimizing long-term health impacts for caregivers.

Risk Factors Contributing to MSDs

Several factors elevate the risk of MSDs for aged care workers. Repetitive movements, such as lifting and transferring residents, are a primary contributor. High forces exerted during these tasks, combined with awkward postures, significantly increase strain. Insufficient training on proper manual handling techniques exacerbates these risks.

Environmental factors, like poorly designed workspaces or inadequate equipment, also play a role. Individual factors, including pre-existing conditions and physical fitness levels, can influence susceptibility. A lack of communication during team handling and insufficient rest breaks further contribute to MSD development.

Principles of Safe Manual Handling

Safe manual handling prioritizes minimizing risk to both caregiver and resident. Maintaining a stable base of support is fundamental, keeping the load close to the body reduces strain. Avoiding twisting and bending at the waist, instead using leg muscles for lifting, is crucial.

Planning the lift, assessing the load’s weight and center of gravity, and ensuring a clear pathway are essential steps. Effective communication with team members during assistance is paramount. Regular breaks and proper posture contribute to preventing fatigue and injury. Prioritizing resident comfort and dignity throughout the process is also key.

Body Mechanics & Posture

Proper body mechanics are the cornerstone of safe manual handling in aged care. Maintaining a straight back, engaging core muscles, and bending at the knees, not the waist, are vital. Feet should be shoulder-width apart for a stable base.

Avoid reaching or twisting while lifting; reposition feet to change direction. Keep the load close to the body to minimize strain on the back. Good posture throughout the task, even when not actively lifting, reduces fatigue. Awareness of personal limits and seeking assistance when needed are crucial components of safe practice.

Load Assessment Techniques

Before any manual handling task, a thorough load assessment is essential. This involves evaluating the weight, size, and shape of the ‘load’ – which includes residents during transfers. Consider the distance the load needs to move, the height it must be lifted to, and the presence of any obstructions.

Assess the resident’s ability to assist, their weight distribution, and any limitations they may have. Identify potential risks, such as uneven surfaces or slippery floors. If the assessment reveals a high-risk situation, utilize assistive devices or seek team assistance to ensure safety.

Team Handling & Communication

Effective team handling relies heavily on clear and concise communication. Before initiating a transfer or repositioning, designate a team leader to coordinate movements and provide instructions. Brief all team members on the plan, including the resident’s capabilities and any specific precautions.

Use standardized terminology to avoid misunderstandings. Maintain constant communication throughout the task, providing feedback and adjusting the plan as needed. Synchronized movements are vital; a count-down before lifting ensures everyone acts simultaneously, minimizing strain and maximizing safety for both staff and residents.

Specific Manual Handling Tasks in Aged Care

Aged care presents unique manual handling challenges requiring specialized training. Assisting with mobility, including transfers between bed, chair, and toilet, demands careful assessment of resident’s abilities and appropriate techniques. Lifting and lowering residents necessitates proper body mechanics and, where possible, the use of assistive devices like hoists.

Repositioning residents in bed to prevent pressure injuries requires gentle movements and frequent adjustments. Assisting with toileting involves supporting residents safely and maintaining their dignity. Training must cover these tasks, emphasizing resident-centered care and minimizing risk for both parties.

Assisting with Mobility (Transfers)

Safe resident transfers are paramount in aged care, demanding thorough training. Assessments must precede each transfer, considering the resident’s strength, balance, and cognitive ability. Staff should utilize transfer aids – belts, slide sheets – when appropriate, prioritizing resident comfort and dignity.

Proper communication is vital; explain the process clearly and obtain resident cooperation. Techniques like pivoting and sliding minimize strain on both caregiver and resident. Training should emphasize avoiding twisting and bending, maintaining a stable base of support, and seeking assistance when needed to prevent injuries.

Lifting and Lowering Residents

Lifting and lowering residents requires specialized training to mitigate risks. Prior assessment of resident’s capabilities and the load’s weight is essential. Staff must employ correct body mechanics – back straight, knees bent, core engaged – to prevent strain.

Avoid reaching or twisting during lifts. Utilize assistive devices like hoists whenever possible, ensuring proper sling selection and secure attachment. Team lifting is crucial for heavier residents, with clear communication and coordinated movements. Training should emphasize the importance of minimizing lifting distances and lowering residents slowly and controlled.

Repositioning Residents in Bed

Regular repositioning is vital for resident comfort and preventing pressure injuries, but poses manual handling challenges. Training must cover techniques for safe turning, rolling, and assisting residents to sit up in bed. Assess each resident’s mobility and support needs before repositioning.

Utilize draw sheets and sliding aids to reduce friction and strain. Encourage resident participation whenever feasible. Team lifting is often necessary, demanding synchronized movements and clear communication. Proper bed height adjustment minimizes bending and reaching for caregivers, reducing risk of musculoskeletal disorders.

Assisting with Toileting


Assisting residents with toileting frequently involves significant manual handling, demanding careful technique to protect both caregiver and resident. Training should emphasize assessing a resident’s ability to assist, utilizing appropriate equipment like commodes or bedpans, and maintaining dignity throughout the process.

Proper transfer techniques to and from the toilet are crucial, including safe use of gait belts. Staff must understand how to support residents with limited mobility, preventing falls and minimizing strain. Clear communication and a calm approach are essential. Reporting any difficulties or changes in a resident’s toileting habits is also vital.

Equipment & Assistive Devices

Utilizing equipment and assistive devices is paramount in reducing manual handling risks within aged care settings. Comprehensive training must cover various tools, including hoists, slide sheets, and adjustable beds, detailing their proper application and limitations. Staff need to understand how to select the appropriate device based on resident needs and task requirements.

Safe operation, pre-use inspection protocols, and routine maintenance are critical components of training. Emphasis should be placed on understanding load limits and ensuring devices are correctly fitted and functioning. Regular checks contribute to preventing equipment failure and ensuring resident safety during transfers and repositioning.

Types of Lifting Equipment (Hoists, Slides)

Hoists are essential for full or partial weight-bearing transfers, offering varying sling types for different resident needs and levels of support. Training must cover hoist assembly, sling selection, safe lifting/lowering techniques, and emergency procedures. Slide sheets minimize friction during lateral transfers and repositioning, reducing shear forces on the skin.

Proper instruction includes understanding weight limits, sling integrity checks, and the importance of clear communication during operation. Staff must practice using equipment under supervision before independent application. Regular equipment maintenance and inspection are vital for safe and effective use, preventing potential injuries to both residents and caregivers.

Using Assistive Devices Safely

Safe utilization of assistive devices demands comprehensive training, emphasizing pre-use checks for functionality and damage. Staff must understand weight capacities, proper application techniques, and potential hazards associated with each device – hoists, slides, or transfer belts. Clear communication with residents throughout the process is paramount, ensuring their comfort and cooperation.

Training should incorporate practical scenarios, focusing on adapting techniques to individual resident needs and limitations. Regular refresher courses reinforce best practices and address emerging safety concerns. Prioritizing resident dignity and minimizing strain on both parties are key principles when employing assistive devices in aged care settings.

Equipment Maintenance & Inspection

Regular maintenance and meticulous inspection of lifting equipment are non-negotiable for resident and staff safety. A documented schedule outlining routine checks – straps, slings, brakes, and electrical components – is essential. Staff must be trained to identify defects, immediately removing damaged equipment from service and reporting it promptly.

Preventative maintenance, conducted by qualified personnel, extends equipment lifespan and minimizes malfunctions. Detailed records of inspections, repairs, and servicing demonstrate compliance with safety standards and accreditation requirements. Proper storage when not in use protects devices from damage and ensures readiness for immediate deployment when needed.

Developing a Manual Handling Training Program

A robust program begins with a thorough needs assessment, identifying specific manual handling tasks and associated risks within the aged care setting. Training objectives should directly address these risks, focusing on safe techniques for assisting with mobility, lifting, and repositioning residents.

Content delivery should blend theoretical knowledge with practical, hands-on sessions. Utilize diverse methods – workshops, demonstrations, and simulated scenarios – to cater to different learning styles. Competency assessment, including observed performance, verifies skill acquisition and ensures staff can apply learned principles safely and effectively, leading to certification.

Needs Assessment & Training Objectives

A comprehensive needs assessment is paramount, pinpointing prevalent manual handling tasks and identifying specific risk factors within the aged care facility. This includes analyzing incident reports, observing work practices, and gathering feedback from staff regarding challenges encountered during resident handling.

Training objectives must directly correlate with identified needs, aiming to reduce musculoskeletal disorder incidence among staff. Objectives should focus on proper body mechanics, safe transfer techniques, effective use of assistive devices, and adherence to WHS protocols, ultimately optimizing resident mobility and safety.

Training Content & Delivery Methods

Core content should encompass principles of safe manual handling, including body mechanics, load assessment, and team handling techniques. Specific modules must address common aged care tasks like assisting with mobility, lifting, repositioning, and toileting, emphasizing resident dignity and comfort.

Delivery methods should be varied – incorporating practical, hands-on sessions with simulated scenarios, alongside theoretical components. Utilizing visual aids, videos, and interactive workshops enhances engagement. Regular refresher courses and updates on best practices are vital, ensuring sustained competency and proactive hazard management.

Competency Assessment & Certification

Robust assessment is paramount, moving beyond theoretical knowledge to practical application. This includes observed performance of manual handling tasks, demonstrating correct techniques and safe practices with simulated residents or equipment. Assessments should evaluate understanding of risk factors, load assessment, and appropriate use of assistive devices.

Successful completion warrants certification, validating competency and adherence to standards. Records of training and assessment must be meticulously maintained for auditing and compliance purposes, supporting aged care accreditation. Periodic re-certification ensures ongoing proficiency and commitment to safe manual handling protocols.

Environmental Considerations for Safe Handling

Optimizing the physical environment significantly reduces manual handling risks for caregivers. This involves assessing and adjusting room layouts to maximize space for maneuvering and minimizing obstructions. Furniture height, particularly seating, should facilitate safe resident transfers, aiding sit-to-stand movements and reducing strain.

Proactive hazard identification and mitigation are crucial – addressing slip, trip, and fall risks through appropriate flooring, lighting, and clear pathways. A well-maintained environment demonstrates a commitment to staff and resident safety, contributing to a culture of preventative care and regulatory compliance.

Optimizing Room Layout & Furniture Height

Strategic room arrangement is paramount for safe manual handling practices. Sufficient clear space allows caregivers to move freely during resident transfers and repositioning, minimizing awkward postures and strain. Decluttering eliminates trip hazards and ensures unobstructed access to assistive devices.

Critically, furniture height – beds, chairs, and commodes – should support safe sit-to-stand transfers. Appropriate heights reduce the physical exertion required by both caregiver and resident, lessening the risk of musculoskeletal disorders. Regular assessment and adjustment of these elements are vital for a safe care environment.

Reducing Slips, Trips & Falls

Maintaining a hazard-free environment is fundamental to preventing injuries for both staff and residents. Promptly address and clean up any spills – liquids or solids – to eliminate slip hazards. Ensure adequate lighting throughout the facility, particularly in hallways and resident rooms, to improve visibility.

Regularly inspect flooring for damage or uneven surfaces, and address repairs immediately. Clear walkways of obstructions like equipment, cords, and personal belongings. Implementing a robust housekeeping schedule and promoting a culture of vigilance are essential for minimizing fall risks within the aged care setting.

Incident Reporting & Investigation

A comprehensive incident reporting system is vital for identifying trends and preventing future manual handling injuries. All incidents, including near misses, must be reported promptly and thoroughly, detailing the circumstances, contributing factors, and individuals involved.

Investigations should be conducted by a trained team to determine root causes, not just immediate triggers. Analyzing incident data allows for targeted interventions, such as revised training or equipment adjustments. The WHS Act mandates reporting, and findings should be shared to foster a learning culture and improve safety protocols within the aged care facility.

Procedures for Reporting Manual Handling Injuries

Clear, accessible procedures for reporting manual handling injuries are essential for employee safety and legal compliance. Staff must be trained on how to report incidents, including completing necessary forms and notifying supervisors immediately.

Reporting should encompass all injuries, regardless of severity, and near misses, to identify potential hazards. The process must ensure confidentiality and non-retribution for reporting. Adherence to the Work Health and Safety (WHS) Act is paramount, requiring prompt investigation and documentation of all reported incidents within the aged care setting.

Analyzing Incident Data to Prevent Recurrence

Thorough analysis of reported manual handling incidents is vital for proactive risk management. This involves identifying trends, root causes, and contributing factors, such as specific tasks, environmental conditions, or inadequate training.

Data analysis should inform improvements to manual handling procedures, equipment selection, and training programs; Quantifying mobility requirements, as suggested for aged care accreditation, aids in identifying systemic issues. Regular review of incident data, coupled with staff feedback, fosters a culture of continuous improvement and minimizes future injury risks within the facility.

The Role of Ongoing Education & Updates

Manual handling best practices evolve, necessitating continuous professional development for aged care staff. Initial training provides a foundation, but regular updates reinforce safe techniques and introduce new equipment or procedures.

Refresher courses should address incident trends identified through data analysis, ensuring lessons learned are integrated into practice. Staying current with WHS Act requirements and Aged Care Act accreditation standards is crucial. Ongoing education fosters a proactive safety culture, empowering staff to confidently handle residents while minimizing musculoskeletal disorder risks and promoting resident comfort.

Benefits of Effective Manual Handling Training

Comprehensive training yields significant advantages for both caregivers and residents within aged care facilities. Reduced injury rates among staff translate to lower operational costs and improved staff retention, fostering a more experienced and dedicated workforce.

Crucially, effective training enhances resident safety and comfort during essential tasks like transfers and repositioning. By optimizing handling techniques and utilizing assistive devices correctly, the risk of resident injury is minimized. This proactive approach also demonstrates compliance with Aged Care Act standards, bolstering accreditation assessments and overall care quality.

Reduced Injury Rates

A primary benefit of robust manual handling training is a demonstrable decrease in musculoskeletal disorders (MSDs) among aged care workers. The high incidence of MSDs within the sector necessitates proactive intervention, and well-designed programs directly address this concern.

Training equips staff with the knowledge to assess risks, employ correct body mechanics, and utilize assistive devices effectively, minimizing strain and potential injuries. This leads to fewer work-related injuries, reduced absenteeism, and lower compensation claims, ultimately creating a safer and more sustainable work environment for caregivers.

Improved Resident Safety & Comfort

Comprehensive manual handling training extends beyond worker wellbeing, significantly enhancing resident safety and overall comfort levels. Skilled staff are better equipped to perform transfers, repositioning, and toileting assistance with minimal risk of causing discomfort or injury to residents.

Proper techniques prioritize resident dignity and reduce the likelihood of falls or complications associated with improper handling. Optimizing mobility, as assessed during accreditation, directly contributes to a higher quality of life for those in aged care, fostering a more supportive and caring environment.

Future Trends in Manual Handling in Aged Care

The future of manual handling in aged care will likely see increased integration of technology and a greater focus on proactive, preventative strategies. Expect advancements in assistive devices, like powered exoskeletons and smart hoists, alongside sophisticated risk assessment tools.

Training will evolve to incorporate virtual reality simulations for realistic practice and personalized learning paths. Emphasis will shift towards ergonomic design of care environments and continuous monitoring of staff wellbeing to mitigate musculoskeletal disorder risks, aligning with evolving WHS standards and accreditation requirements.

Guide

lillia jg guide

Lillia Jungle Guide ౼ Season 2026

Discover the ultimate Lillia jungle guide for Season 2026, featuring optimal runes, builds, pathing, and gameplay strategies to dominate the Rift!

Lillia, the Spirit Blossom, is a potent AP-scaling jungler renowned for her unique movement speed and crowd control capabilities․ This guide delves into maximizing her potential throughout Season 2026․ She excels at swiftly clearing camps and executing impactful ganks, particularly against squishy targets․ Mastering Lillia requires understanding her reliance on stacking her passive, Lilting Lullaby, to lock down enemies․

Her playstyle revolves around weaving in and out of combat, utilizing her mobility to avoid damage while consistently applying damage․ This guide will cover everything from rune selections and item builds to optimal jungle pathing and teamfight strategies, ensuring you climb the ranks with Lillia!

Lillia’s Strengths and Weaknesses

Lillia boasts exceptional strengths in skirmishes and teamfights, utilizing her area-of-effect crowd control to disrupt enemy formations․ Her high mobility allows for swift rotations and effective ganking, especially against vulnerable mages․ She scales remarkably well with AP, becoming a significant threat in the mid-to-late game․ However, Lillia struggles against tanky compositions due to her limited physical damage․

Early game vulnerability to invades and counter-jungling is a key weakness․ Reliant on passive stacks, she can be shut down if denied farm․ Careful pathing and objective control are crucial to overcome these challenges and maximize her impact․

Runes for Lillia Jungle

Optimize Lillia’s jungle performance with a focused rune setup, prioritizing sustain, damage amplification, and adaptive force to maximize her ganking potential․

Primary Rune: Conqueror

Conqueror is the cornerstone of Lillia’s rune page, providing crucial adaptive force stacks during extended skirmishes and team fights․ As a scaling champion, Lillia benefits immensely from the increased damage output that Conqueror offers, especially when chaining abilities and consistently auto-attacking․ This rune synergizes perfectly with her kit, allowing her to quickly stack and maintain the bonus damage throughout engagements․ It’s particularly effective against tankier compositions where sustained damage is key to breaking through defenses․ Prioritize stacking Conqueror in prolonged fights to truly unlock its potential, turning Lillia into a formidable threat․ Remember to actively participate in combat to maximize stack accumulation․

Secondary Rune: Inspiration

The Inspiration tree complements Lillia’s playstyle by offering valuable utility and sustain in the jungle․ Opting for Magical Footwear grants free boots at 12 minutes, saving gold for core items and enhancing roaming potential․ Pair this with Cosmic Insight to reduce summoner spell cooldowns, enabling more frequent Flash usage for aggressive plays or escapes․ This combination significantly improves Lillia’s early-game efficiency and map presence․ Inspiration provides a subtle yet impactful advantage, allowing for faster rotations and increased opportunities to influence lanes, ultimately accelerating her scaling․

Shard Runes ౼ Adaptive Force, Armor, Magic Resist

For shard runes, Adaptive Force is crucial for maximizing Lillia’s damage output, scaling effectively with her ability power․ Against most compositions, taking a single point in Armor provides essential early-game survivability against physical damage threats commonly found in the jungle and lanes․ However, if facing a heavily magic damage-focused enemy team, swapping to Magic Resist is advisable․ This adjustment enhances Lillia’s resilience, allowing her to withstand burst damage and remain effective in team fights, ensuring consistent damage contribution․

Summoner Spells for Lillia

Essential summoner spells for Lillia include Flash for crucial mobility and Smite, a necessity for effectively executing jungle objectives and securing camps․

Flash ౼ Essential for Mobility

Flash is undeniably the most crucial summoner spell for Lillia, offering unparalleled utility in various scenarios․ It allows for aggressive plays, enabling you to quickly close the gap and burst down priority targets during ganks․ Defensively, Flash provides a lifeline, helping you escape unfavorable engagements or reposition during teamfights․ Mastering Flash-induced combos, like flashing forward to extend the range of your Lilting Lullaby, is key to maximizing your impact․

Consider using Flash to dodge crucial enemy abilities or to secure objectives like Dragon or Baron․ Its versatility makes it an indispensable tool in your kit, significantly enhancing your overall survivability and playmaking potential․

Smite ౼ Required for Jungle Role

Smite is a non-negotiable summoner spell for any jungler, including Lillia․ It’s essential for securing jungle objectives like Blue Buff, Red Buff, Dragon, and Baron Nashor, providing a significant advantage to your team․ Utilizing Smite effectively also allows you to contest these objectives against the enemy jungler, potentially turning the tide of the game․

Beyond objective control, Smite can be used to finish off low-health monsters, speeding up your jungle clear and enabling faster ganks․ Mastering the timing of Smite is crucial for maximizing its efficiency and impact throughout the game․

Jungle Pathing ౼ Early Game

Optimize your early game with efficient jungle routes, starting at Blue Buff or Red Buff, setting up successful ganks and securing early advantages․

Starting at Blue Buff

Commencing your jungle journey at Blue Buff provides a smoother early experience for Lillia, enhancing mana regeneration crucial for frequent skill usage․ Secure the buff, then proceed to Gromp, utilizing your abilities to clear the camp swiftly․ Following Gromp, target the Wolves, maintaining a focus on efficient health management․

After Wolves, move towards Raptors, carefully positioning yourself to maximize AoE damage from your Blooming Bustle (Q)․ Finally, secure Krugs before assessing ganking opportunities․ This path prioritizes scaling and allows for a level three gank towards mid lane, capitalizing on early game pressure and potentially securing a lead for your team․ Remember to ward key areas to prevent invades!

Alternative Red Buff Start

Opting for a Red Buff start offers aggressive early game potential, enabling impactful ganks and early dragon control․ Immediately after securing Red Buff, prioritize the Krugs to quickly reach level three․ Following Krugs, move to Raptors, utilizing your abilities for efficient clearing and preparing for a gank․

Target the lane most susceptible to an early gank – typically mid or a pushed-out top lane․ This aggressive approach aims to snowball a lead, disrupting the enemy jungler and securing objectives․ Remember to track the enemy jungler’s movements and ward accordingly to mitigate counter-ganking risks․ This path is riskier but rewards proactive play․

Efficient Ganking Routes

Lillia’s ganking success hinges on utilizing her movement speed and crowd control effectively․ From the mid lane, path through the river bush, utilizing the terrain for concealment․ For top lane ganks, approach from the tri-bush, maximizing surprise; Prioritize ganking lanes where enemies are overextended or lack escape tools․

Remember to coordinate with your laners, signaling your intentions before engaging․ Utilize Lilting Lullaby to set up ganks, ensuring enemies remain within range of your follow-up abilities․ Post-gank, assess objective control opportunities, such as securing Rift Herald or dragon, capitalizing on the lane advantage․

Lillia’s Skill Max Order

Maximize Blooming Bustle (Q) first for wave clear and damage, followed by Wilt (W) for sustained fights, and lastly Lilting Lullaby (E)․

Prioritizing Q ⎯ Blooming Bustle

Blooming Bustle is your primary damage source and wave-clearing ability as Lillia, making it crucial to max first․ Each rank increases the movement speed bonus and damage dealt, significantly enhancing your ganking potential and jungle clear speed․ Prioritizing Q allows you to quickly traverse the jungle, reach lanes faster, and consistently apply pressure․

The increased movement speed stacks with other sources, enabling you to stick to targets effectively during skirmishes and team fights․ Furthermore, the burst damage from a fully-ranked Q can quickly eliminate squishy enemies, securing objectives and turning the tide of battle․ Mastering Q is fundamental to successful Lillia gameplay․

W ⎯ Wilt ⎯ Second Priority

Wilt should be your second skill priority, offering valuable slow and damage over time․ While not as impactful as Blooming Bustle for initial clear speed, Wilt significantly enhances your ability to secure ganks and control team fights․ The slow allows you to reliably land your other abilities, particularly Lilting Lullaby․

Investing points into Wilt increases the damage dealt over time and the slow percentage, making it harder for enemies to escape your relentless pursuit․ It’s particularly effective against tankier opponents who might survive the initial burst from your Q․ Mastering Wilt’s application is key to sustained damage output․

E ⎯ Lilting Lullaby ౼ Last Priority

Lilting Lullaby is your last skill priority, primarily because Lillia’s early game focuses on farming and setting up ganks with Q and W․ While the ultimate’s sleep effect is powerful, it requires precise timing and follow-up, which is less crucial in the initial stages․ Maxing it last doesn’t diminish its late-game potential․

However, don’t neglect it entirely! Even a single point in Lilting Lullaby provides valuable zone control and can interrupt enemy abilities․ As the game progresses, maximizing this skill unlocks its full potential for team fight disruption and securing objectives․

Item Build ౼ Core Items

Essential for maximizing damage, Liandry’s Torment and Sorcerer’s Shoes are core purchases, providing AP, magic penetration, and sustained damage output․

Liandry’s Torment ౼ Core Item

Liandry’s Torment is absolutely pivotal on Lillia, functioning as her primary damage amplifier and scaling tool․ Its passive, which applies a burn based on enemy maximum health, synergizes exceptionally well with Lillia’s kit, particularly her Q – Blooming Bustle, and W – Wilt․ The burn effect consistently chips away at enemy health, making it ideal for extended skirmishes and team fights․

Furthermore, the ability haste provided by Liandry’s allows for more frequent spell casts, enhancing Lillia’s overall damage output and control․ Building Liandry’s early ensures you can effectively apply the burn and capitalize on its scaling potential throughout the game, making it a non-negotiable core item for success․

Sorcerer’s Shoes ౼ Magic Penetration

Sorcerer’s Shoes are the go-to footwear choice for Lillia, significantly boosting her magical damage output․ The magic penetration they provide is crucial for cutting through enemy magic resistance, allowing her spells to deal substantial damage, especially against opponents building defensively․ This is particularly important as Lillia relies heavily on magic damage to carry games․

Investing in Sorcerer’s Shoes early ensures that your spells remain impactful throughout the laning phase and into team fights; Without sufficient magic penetration, your damage will quickly fall off against resistant enemies, hindering your ability to effectively contribute to team engagements and secure objectives․

Item Build ౼ Situational Items

Adapt your build with Rabadon’s, Void Staff, or Zhonya’s based on enemy team composition, offering scaling, penetration, or defensive utility․

Rabadon’s Deathcap ౼ AP Scaling

Rabadon’s Deathcap is a crucial situational item for Lillia, significantly amplifying her already substantial Ability Power (AP) scaling․ Purchasing this item after core components like Liandry’s Torment and Sorcerer’s Shoes allows Lillia to burst down priority targets with increased damage output from all her abilities․

The massive AP boost provided by Rabadon’s synergizes exceptionally well with Lillia’s kit, particularly her Blooming Bustle (Q) and Lilting Lullaby (E)․ It’s most effective when facing squishy enemy compositions lacking significant magic resistance, maximizing the impact of her area-of-effect damage and crowd control․ Consider it a high-priority purchase when snowballing a lead․

Void Staff ⎯ Magic Resistance Penetration

Void Staff becomes essential when encountering enemy teams stacking Magic Resistance (MR)․ Lillia relies heavily on magic damage, and MR can severely diminish her effectiveness in team fights and during objective control․ Building Void Staff allows her to bypass a significant portion of enemy MR, restoring her damage output against resilient opponents․

Prioritize Void Staff if the enemy team has multiple champions building MR items like Spirit Visage or Force of Nature․ It synergizes well with Liandry’s Torment, ensuring consistent damage even through MR stacking․ Don’t delay acquiring it if facing a composition designed to counter magic damage․

Zhonya’s Hourglass ౼ Defensive Option

Zhonya’s Hourglass provides crucial survivability for Lillia, especially against burst damage compositions․ Its active ability grants temporary invulnerability, allowing her to dodge critical abilities and reposition during team fights․ This is particularly useful when initiating with Lilting Lullaby or when targeted by assassins․

Consider Zhonya’s when facing high-threat AP champions or teams with significant crowd control; It complements Lillia’s squishy nature, offering a lifeline in chaotic engagements․ While it delays damage output, the defensive benefit often outweighs the cost, ensuring she lives to continue dealing damage․

Lillia Jungle Gameplay ౼ Mid to Late Game

Transition into a teamfight-focused playstyle, utilizing objective control and strategic ganks to carry your team to victory with Lillia!

Teamfighting Strategy

Lillia excels at disrupting enemy formations in teamfights․ Prioritize flanking maneuvers to maximize the impact of her Lilting Lullaby, putting key targets to sleep․ Utilize Blooming Bustle to swiftly engage or disengage, weaving in and out of combat while dealing consistent damage․


Focus on isolating vulnerable carries, but be mindful of peel from the enemy team․ Coordinate with your team to capitalize on crowd control chains initiated by your sleep effects․ Remember, Lillia is relatively squishy, so positioning is crucial for survival․ Avoid being the primary engage unless absolutely necessary, and aim to clean up after the initial chaos․

Objective Control ⎯ Dragon and Baron

Lillia’s objective control revolves around swift, decisive engagements․ Before attempting a dragon or Baron steal, utilize Lilting Lullaby to incapacitate the enemy jungler or key defenders․ Coordinate with your team to secure vision control around the pit, denying enemy information and setting up favorable skirmishes․

During the objective take, focus on applying consistent damage with Blooming Bustle and Liandry’s Torment․ Be aware of enemy rotations and be prepared to disengage if outnumbered; Prioritize securing soul points, as Lillia benefits greatly from the enhanced stats and team buffs they provide․

Split Pushing Considerations

Lillia excels at split pushing due to her rapid clear speed and mobility with Blooming Bustle․ Prioritize lanes where you can quickly take towers and apply pressure, forcing enemy responses․ Maintain vision control to avoid ganks and track enemy movements․

When split pushing, build items like Void Staff to penetrate magic resistance and accelerate tower destruction․ Be mindful of teleport plays from the enemy team and position yourself safely․ Communicate with your team to coordinate objective trades while you draw pressure, creating opportunities for map control․

Tips and Tricks for Lillia Jungle

Master Lilting Lullaby for crucial crowd control, maximize Blooming Bustle damage, and utilize kiting techniques to outplay opponents in extended engagements․

Effective Use of Lilting Lullaby

Lilting Lullaby is Lillia’s bread and butter for initiating ganks and teamfights; mastering its application is paramount․ Aim to land it on multiple champions whenever possible, utilizing its wide arc and relatively quick cast time․ Remember, enemies hit by the lullaby are slowed and then put to sleep!

Positioning is key – flank enemies or catch them off guard․ Combine it with your Blooming Bustle (Q) for maximum damage output while they’re vulnerable․ Don’t underestimate its utility in securing objectives like Dragon or Baron, disrupting enemy positioning and creating opportunities for your team․ Practice predicting enemy movement to consistently land this crucial ability․

Maximizing Blooming Bustle Damage

Blooming Bustle (Q) is Lillia’s primary damage source; maximizing its effectiveness is crucial for success․ Utilize the dash to weave in and out of combat, applying on-hit effects and stacking your passive․ Prioritize dashing through multiple enemies to amplify the damage output significantly․

Remember, each dash increases the damage dealt, so chaining dashes is vital․ Combine it with Liandry’s Torment for increased burn damage over time․ Position yourself strategically to maximize the number of enemies hit with each dash, turning skirmishes into swift victories․ Mastering this skill is key to carrying games!

Kiting with Lillia

Lillia’s kiting relies on clever use of Lilting Lullaby (E) and Blooming Bustle (Q)․ Cast E to slow enemies, creating distance while simultaneously applying damage․ Follow up with Q dashes to maintain separation and continue dealing consistent damage․

Effectively kiting allows you to avoid incoming damage and control the pace of engagements․ Utilize terrain to your advantage, weaving around jungle walls or lane bushes․ Remember, auto-attacks between Q dashes enhance your kiting potential․ Practice this technique to become a slippery and formidable opponent!

Matchups ౼ Favorable and Unfavorable

Lillia excels against squishy mages, but struggles versus tanky champions․ Understanding these matchups is crucial for successful jungle dominance and strategic decision-making․

Strong Against ౼ Squishy Mages

Lillia truly shines when facing squishy mage champions in the mid and late game․ Her kit allows her to quickly close the gap and burst down vulnerable targets before they can react․ The combination of her Q ⎯ Blooming Bustle and W ⎯ Wilt provides significant damage and slows, making it incredibly difficult for mages to escape her relentless assault․

Furthermore, E ⎯ Lilting Lullaby can effectively neutralize their magical damage output, turning the tables in team fights․ Champions like Ahri, LeBlanc, and Syndra are particularly susceptible to Lillia’s aggressive playstyle, as they lack the durability to withstand her sustained damage and crowd control․ Prioritize ganking lanes with these mages to snowball your lead․

Weak Against ౼ Tanky Champions

Lillia struggles significantly against tanky champions who possess high health, armor, and magic resistance․ Her damage output, while substantial against squishier targets, diminishes rapidly when facing durable opponents․ Champions like Ornn, Malphite, and Sion can absorb a considerable amount of her burst damage, rendering her ineffective in prolonged engagements․

Additionally, their crowd control abilities can disrupt her Q ౼ Blooming Bustle dashes and prevent her from effectively utilizing W ⎯ Wilt․ Focus on peeling for your carries and avoiding direct confrontations with these tanks; instead, prioritize flanking and targeting their squishier teammates․

Lillia Jungle ౼ Season 1 Patch 26․4 Meta

Currently, Lillia boasts solid win rates, with Liandry’s Torment builds dominating; adapting to patch changes is crucial for sustained success․

Current Win Rates and Build Trends

As of Patch 26․4, Lillia jungle demonstrates a consistently respectable win rate, hovering around 53-55% in higher elo brackets, indicating a viable pick for competitive play․ The most prevalent build path centers around Liandry’s Torment as the core item, capitalizing on her consistent damage output and ability to apply grievous wounds․ Sorcerer’s Shoes remain a staple for maximizing magic penetration, crucial for bursting down priority targets․

Players are increasingly incorporating Rabadon’s Deathcap to amplify her late-game scaling, while Void Staff addresses compositions with significant magic resistance․ Observational data suggests a slight uptick in Zhonya’s Hourglass purchases as a reactive defensive measure against burst assassins․ Mastering these trends will significantly improve your success with Lillia․

Adapting to Patch Changes

League of Legends patches frequently introduce alterations impacting champion viability; Lillia is no exception․ Monitor patch notes closely for adjustments to item stats, rune effectiveness, or her core abilities․ If Liandry’s Torment receives nerfs, explore alternative mythic options like Everfrost or Dictating Orb․ Changes to jungle camp respawn timers necessitate adjustments to pathing efficiency․

Be prepared to modify your build based on enemy team composition․ Increased tankiness demands more magic penetration, while squishy teams benefit from maximizing burst damage․ Flexibility and a willingness to experiment are key to maintaining a high win rate with Lillia throughout the season․

PreviousNext

You Want To Have Your Favorite Car?

We have a big list of modern & classic cars in both used and new categories.