avaya 9611g quick user guide
Avaya 9611G Quick User Guide ⎻ Overview
The Avaya 9611G is an 8-line IP deskphone, perfect for everyday users needing reliable communication tools like speed dial and directory access.
What is the Avaya 9611G?
The Avaya 9611G is a versatile and user-friendly IP deskphone designed to enhance everyday communication. It’s an 8-line model, making it ideally suited for users who rely on core telephony functions to boost productivity. This phone isn’t geared towards advanced users, but rather those who appreciate simplicity and reliability.
Supporting both Session Initiation Protocol (SIP) and Digital Enhanced Cordless Telecommunications (DECT), the 9611G seamlessly integrates with various communication systems. This allows for flexible call handling across different platforms. Avaya emphasizes that users should adhere to the instruction manual for proper equipment operation, and disclaims responsibility for unauthorized modifications. It provides a solid foundation for essential office communication needs.
Target User Profile
The Avaya 9611G is primarily designed for the everyday user – individuals who view their phone as a crucial, yet straightforward, communication tool. This profile encompasses those who regularly utilize common features like speed dial and the directory to streamline their calls and enhance overall productivity.
It’s not intended for power users requiring complex functionalities. Instead, it caters to those who appreciate a reliable and easy-to-operate device. The 9611G suits employees who need consistent call quality and basic features without the need for extensive configuration or advanced technical knowledge. Essentially, it’s for users who want a phone that simply works efficiently.
Phone Layout & Key Functions
The Avaya 9611G features a standard layout with a keypad, display screen, and function keys for navigating calls and accessing essential features easily.
Physical Components of the 9611G
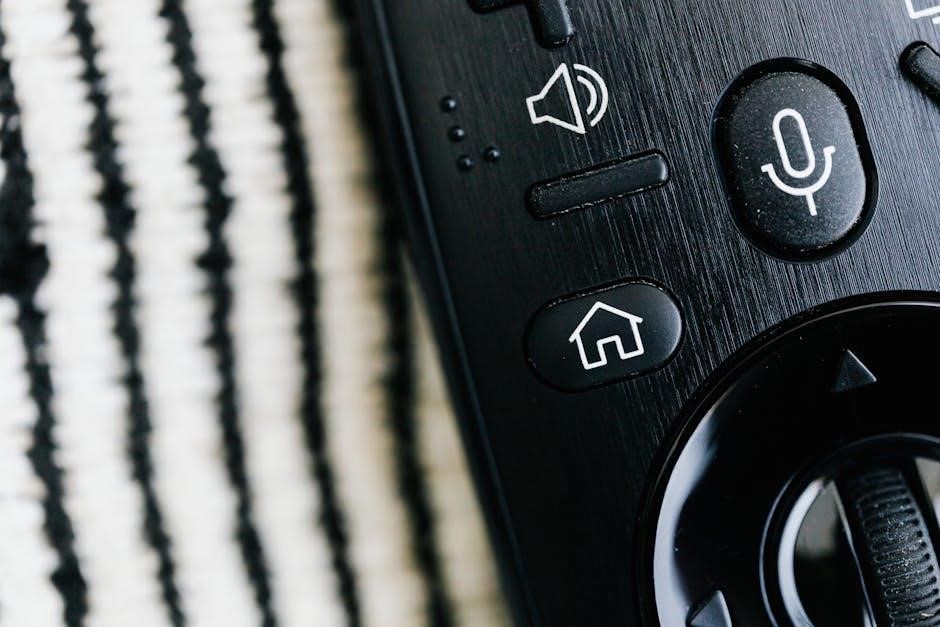
The Avaya 9611G boasts a user-friendly design, incorporating several key physical components. A prominent display screen provides call information and menu navigation. Below the screen resides a standard numeric keypad for dialing and accessing features. Dedicated function keys offer one-touch access to commonly used options like hold, transfer, and conference calling.
Additionally, the phone includes volume control buttons for adjusting audio levels. A navigation cluster allows for intuitive menu scrolling and selection. A headset jack enables hands-free communication, while Ethernet ports facilitate network connectivity. The base provides stable placement, and the handset offers a comfortable grip during calls. These components work together to deliver a streamlined and efficient communication experience.
Keypad Functions & Navigation
The Avaya 9611G keypad facilitates dialing and feature access. Numeric keys input phone numbers, while the ‘*’ and ‘#’ keys often trigger special functions or menu options. The navigation cluster, typically located below the keypad, enables menu scrolling and selection.
Users can utilize the directional keys (up, down, left, right) to navigate through on-screen menus and lists. A central ‘OK’ or ‘Select’ button confirms selections. The ‘Cancel’ or ‘Exit’ key returns to the previous menu. Softkeys, dynamically labeled on the display, provide context-sensitive actions. Mastering this navigation system allows efficient access to the phone’s diverse features and settings, enhancing overall usability.
Display Screen Information
The Avaya 9611G’s display screen provides crucial call and phone status information. It typically shows the current time, date, and line appearances, indicating active or inactive lines. Incoming caller ID information, including name and number, is prominently displayed during an incoming call.
Softkeys located beneath the screen dynamically change to reflect the current context, offering quick access to frequently used functions like hold, transfer, and conference. The screen also presents menu options and settings, guiding users through phone configuration. Visual cues, such as icons, indicate message waiting or other important notifications, ensuring users stay informed.
Making and Receiving Calls
The Avaya 9611G facilitates seamless communication, allowing users to easily make and answer calls, utilizing features like hold and transfer efficiently.
Making an Outgoing Call
To initiate an outgoing call on your Avaya 9611G, simply lift the handset or press the speakerphone button. Then, dial the desired phone number using the keypad. The phone supports various dialing methods, including direct dialing of internal and external numbers.
Before dialing, ensure you have the correct area code if calling a long-distance number. The display screen will show the dialed number as you enter it. Once the number is complete, the call will automatically connect.
You can also utilize the directory or speed dial features for quicker access to frequently called numbers, streamlining your calling process and boosting productivity. Remember to verify the connection before proceeding with your conversation.
Answering an Incoming Call
When receiving a call on your Avaya 9611G, the phone will ring, and the display screen will illuminate with caller ID information, if available. To answer the call, simply lift the handset from the cradle or press the speakerphone button. The call will immediately connect, allowing you to begin your conversation.
The display screen will show the call duration once the connection is established. You can easily switch between handset and speakerphone during the call as needed. Ensure a clear audio connection for optimal communication.
If you wish to ignore the incoming call, simply allow it to ring until it stops, or press the ‘Reject’ button if available on your system configuration.
Putting a Call on Hold
To place an active call on hold using your Avaya 9611G, press the ‘Hold’ button located on the phone’s keypad. The display screen will indicate that the call is now on hold, typically with a visual indicator like a flashing light or a specific on-screen message. The other party will usually hear hold music or a silence, depending on the system configuration.
To retrieve a call from hold, simply press the ‘Hold’ button again. This will resume the conversation with the original caller. Be mindful of extended hold times, as callers may become disconnected.
Some systems allow for warm transfers from hold, connecting the caller to another extension.
Transferring a Call
Transferring a call on the Avaya 9611G allows you to connect a caller to another extension. First, place the current call on hold by pressing the ‘Hold’ button. Then, dial the extension number of the person you wish to transfer the call to. Once you hear ringing or receive an answer, press the ‘Transfer’ button to complete the transfer.
For a warm transfer, speak to the recipient before connecting the caller, ensuring they are available. Some systems may require a different transfer key or sequence. Always confirm the transfer is successful before disconnecting.
Incorrect transfers can disconnect callers, so double-check the extension number.
Call Features
The Avaya 9611G offers useful features, including a directory for contacts, speed dial for quick access, call forwarding, and convenient conference calling options.
Using the Directory
The Avaya 9611G directory feature allows you to store and quickly access frequently called numbers and contact information. To access the directory, press the “Directory” softkey on the phone’s display screen. You can then search for contacts by name or number using the keypad.
Adding new contacts is typically done through the phone’s system administrator or a web-based interface, depending on your organization’s setup. Once a contact is found, you can initiate a call by pressing the “Call” softkey. The directory is a valuable tool for enhancing productivity and streamlining your communication process, eliminating the need to manually dial numbers repeatedly. Regularly updated directories ensure accurate and efficient contact management.
Speed Dial Configuration & Usage
Speed dial on the Avaya 9611G significantly reduces call connection time for frequently contacted individuals. Configuration is usually managed by the system administrator, assigning numbers to specific speed dial codes. To use speed dial, press the “Speed Dial” softkey, followed by the assigned two-digit code for the desired contact.
The phone will then automatically dial the associated number. Speed dial is a powerful productivity tool, especially for internal extensions or important external contacts. Your organization may offer a list of pre-configured speed dial numbers. Contact your IT department for assistance with adding or modifying speed dial entries if needed, ensuring efficient communication.
Call Forwarding Options
The Avaya 9611G offers versatile call forwarding, ensuring you never miss important calls. You can forward calls to another extension, an external phone number, or even a voicemail box. Access call forwarding settings through the phone’s menu, typically under “Settings” or “Call Forwarding.” Options usually include “Always Forward,” “Busy Forward,” and “No Answer Forward.”
“Always Forward” directs all calls, while “Busy Forward” activates when you’re already on a call. “No Answer Forward” forwards calls if unanswered after a set number of rings. Remember to deactivate forwarding when no longer needed to avoid misdirected calls. Consult your system administrator for specific instructions and available options within your organization’s configuration.
Conference Calling
The Avaya 9611G facilitates efficient conference calls, allowing multiple participants to connect simultaneously. To initiate a conference, first establish a call with the initial participant. Then, place that call on hold and dial the next participant. Once connected, you can typically merge the calls into a conference using a dedicated “Conf” or “Merge” softkey on the phone’s display.
You can add further participants by repeating the hold-and-dial process. Manage the conference by muting individual participants or adjusting speaker volume. Remember to check your system’s limitations regarding the maximum number of participants allowed per conference call. Consult your system administrator for specific procedures and available features.
Advanced Features
The Avaya 9611G supports SIP and DECT protocols, offering Message Waiting Indicator (MWI), adjustable volume, headset compatibility, and integration with various systems.
Using Message Waiting Indicator (MWI)
The Message Waiting Indicator (MWI) on the Avaya 9611G alerts you to new voice messages. When a new message arrives, the MWI icon – typically a red light or a specific symbol on the display screen – illuminates or flashes. This visual cue ensures you don’t miss important communications.
To access your voicemail and retrieve these messages, you’ll generally need to press a dedicated voicemail key on the phone. The specific key may vary depending on your system configuration, but it’s often labeled “Messages” or a similar designation. Following the prompts will guide you through listening to and managing your voicemail.
Clearing the MWI typically happens automatically after you’ve listened to all new messages. However, some systems may require a specific action to manually clear the indicator. Consult your system administrator for details if the MWI remains active after checking your voicemail.
Adjusting Volume Settings
The Avaya 9611G allows you to customize audio levels for both the ringer and the handset/headset volume. Dedicated volume control keys, usually located on the front or side of the phone, enable quick adjustments. Pressing the “Volume Up” key increases the loudness, while “Volume Down” decreases it.
These adjustments affect the audio during active calls, as well as the ringer volume for incoming calls. Some systems may also offer separate settings for handset and headset volumes, providing greater control over your listening experience.
Experiment with different volume levels to find what’s most comfortable for your environment and personal preference. Be mindful of maintaining a safe listening volume to protect your hearing.
Headset Compatibility & Setup
The Avaya 9611G supports a wide range of headsets, enhancing privacy and comfort during calls. Typically, headsets connect via a standard RJ-11 port located on the side or back of the phone. Ensure your headset is compatible with Avaya systems for optimal performance.
For initial setup, simply plug the headset cable into the designated port. The phone should automatically detect the headset. If not, you may need to adjust audio settings within the phone’s menu. Some headsets require a separate amplifier, particularly for older models or longer cable lengths.
Verify proper functionality by making a test call and confirming clear audio transmission and reception.
SIP Protocol Support
The Avaya 9611G boasts robust support for the Session Initiation Protocol (SIP), a widely adopted standard for voice and video communication. This compatibility allows seamless integration with various IP-based phone systems and Unified Communications platforms. Utilizing SIP enables features like call routing, registration, and advanced call handling capabilities;
Configuration typically involves entering SIP server details – including address, port, and authentication credentials – within the phone’s settings menu. Proper SIP configuration is crucial for successful call establishment and feature functionality.
The 9611G’s SIP support ensures flexibility and interoperability within modern communication infrastructures.
Navigation & System Settings
Access the settings menu on the Avaya 9611G to customize features like date, time, and language preferences for a personalized user experience.
Accessing the Settings Menu
To access the settings menu on your Avaya 9611G, begin by ensuring the phone is in an idle state – not currently engaged in a call. Press the ‘Menu’ or ‘Options’ softkey, typically located directly below the display screen. This action will bring up the main settings menu on the phone’s display.
Utilize the navigation keys – the directional arrows – to scroll through the available options. These options generally include settings for date and time, language preferences, volume control, and network configurations. Select the desired setting by pressing the ‘Select’ or ‘OK’ softkey.
Within each setting, you can further adjust parameters using the same navigation and selection process. Remember to save any changes made before exiting the settings menu to ensure they are applied.
Date and Time Configuration
Configuring the date and time on your Avaya 9611G ensures accurate call logs and proper system synchronization. From the main settings menu, navigate to and select the ‘Date/Time’ option using the directional keys and ‘Select’ softkey. You’ll typically be presented with separate fields for date and time adjustment.
Use the numeric keypad to enter the correct date, following the format displayed on the screen (usually MM/DD/YYYY). Similarly, input the correct time, often in a 24-hour format (HH:MM:SS). After entering the desired values, select ‘Save’ or ‘Apply’ to confirm your changes.
Verify the updated date and time displayed on the phone’s screen to confirm successful configuration.
Language Settings
Personalizing your Avaya 9611G includes setting your preferred display language. Access the settings menu using the navigation keys and ‘Select’ softkey, then locate the ‘Language’ option. A list of available languages will appear on the screen; use the up and down directional keys to scroll through the options.
Highlight your desired language and press ‘Select’ to apply the change. The phone’s interface, including menus and prompts, will then be displayed in the newly selected language.
If you need to revert to the default language, simply repeat these steps and choose your original preference from the list. This feature enhances usability for a diverse user base.
Troubleshooting Common Issues
Common problems include no dial tone or poor audio; check connections and headset setup first; Display issues may require a phone reset.
No Dial Tone Troubleshooting
Experiencing no dial tone with your Avaya 9611G? Begin by verifying the physical connection of the phone to the network. Ensure the Ethernet cable is securely plugged into both the phone and the network jack. Confirm the cable isn’t damaged.
Next, check if the phone is properly registered with the Avaya system. A reboot of the phone can often resolve temporary registration issues. If the problem persists, verify that the network itself has connectivity.
Test with another device to rule out a broader network outage. Finally, consult your system administrator to confirm the phone’s configuration within the Avaya system is correct and hasn’t been inadvertently altered.
Poor Audio Quality Solutions
If you’re experiencing poor audio quality on your Avaya 9611G, several factors could be at play. First, check your headset connection if you’re using one; a loose or faulty headset can cause static or muffled sound. Ensure the volume level is appropriately adjusted on both the phone and your headset.
Next, investigate potential network issues. Packet loss or network congestion can significantly degrade audio quality. Try restarting your phone and, if possible, test the connection with another device.
Finally, confirm that the phone’s firmware is up-to-date, as updates often include audio optimization improvements. Contact your IT administrator if issues persist.
Display Issues & Fixes
Encountering display problems with your Avaya 9611G? A blank or flickering screen often indicates a power issue. Verify the power adapter is securely connected to both the phone and a working electrical outlet. Try a different outlet to rule out a power source problem.
If the screen is dim, adjust the backlight settings within the phone’s settings menu. For distorted images or unresponsive touchscreens, a simple phone restart can often resolve the issue.
Should problems persist, check for available firmware updates, as these frequently address display-related bugs. Contact your IT support for further assistance if needed.

Maintenance & Safety
Regularly clean the Avaya 9611G with a soft, dry cloth. Avoid liquids and harsh chemicals. Follow all standard safety precautions when using electrical equipment.
Cleaning the Phone
To ensure the longevity and optimal performance of your Avaya 9611G, regular cleaning is recommended. Always disconnect the power adapter before commencing any cleaning procedures. Use a soft, lint-free cloth, slightly dampened with water if necessary, to wipe down the exterior surfaces of the phone.
Avoid using abrasive cleaners, solvents, or harsh chemicals, as these can damage the plastic casing and potentially affect the functionality of the device. Pay particular attention to the keypad and display screen, gently removing any dust or fingerprints. For hard-to-reach areas, a can of compressed air can be used to dislodge debris.
Ensure the phone is completely dry before reconnecting the power adapter. Proper cleaning not only maintains a professional appearance but also helps prevent the buildup of germs and bacteria.
Important Safety Precautions
When using the Avaya 9611G IP Deskphone, adhere to these crucial safety guidelines. Avoid using the device during thunderstorms to prevent electrical shock. Do not expose the phone to extreme temperatures or humidity, as this can cause damage or malfunction.
Never attempt to disassemble or repair the phone yourself; contact qualified personnel for any maintenance needs. Ensure the power adapter is properly grounded and avoid overloading electrical outlets; Keep liquids away from the phone to prevent short circuits.
Always follow the manufacturer’s instructions outlined in the user manual. Proper usage and care will ensure a safe and reliable communication experience with your Avaya 9611G.